Antwerp QC, Much of Belgian Core, Leaves Competitive Quidditch
All images in this article are by Photo Editor Matt Dwyer, unless otherwise noted.
Just starting out shooting quidditch and have no clue what to do? Have you been taking photos at tournaments but want to take your craft to the next level? Here are ten simple tips I learned from photographer Michael E. Mason and my own experiences that will have people wanting your photos so badly, they’ll be knocking at your door before you can finish downloading your images (looking at you Austin Pitts):
1. Focus: Every photo should be in focus, with the only exception being when you are asked to take an out-of-focus shot specifically to enhance a story.
Lack of focus causes an image to not only be a blurred mess, but also makes an image look flat:
With the image out-of-focus, it looks bland.
Many new photographers fall into the trap of relying on autofocus. Oftentimes, this setting actually focuses in on the last thing in the image you wanted to highlight.

Bushes are not nearly as exciting as quidditch, so they should not be in focus.
You’ll notice in the above image, the camera is focused on the background and not focused on the action. If the focus wasn’t corrected to highlight the action in time for this next photo, this would have been just another shot in the recycle bin.
Let’s just pretend she’s on her broom.
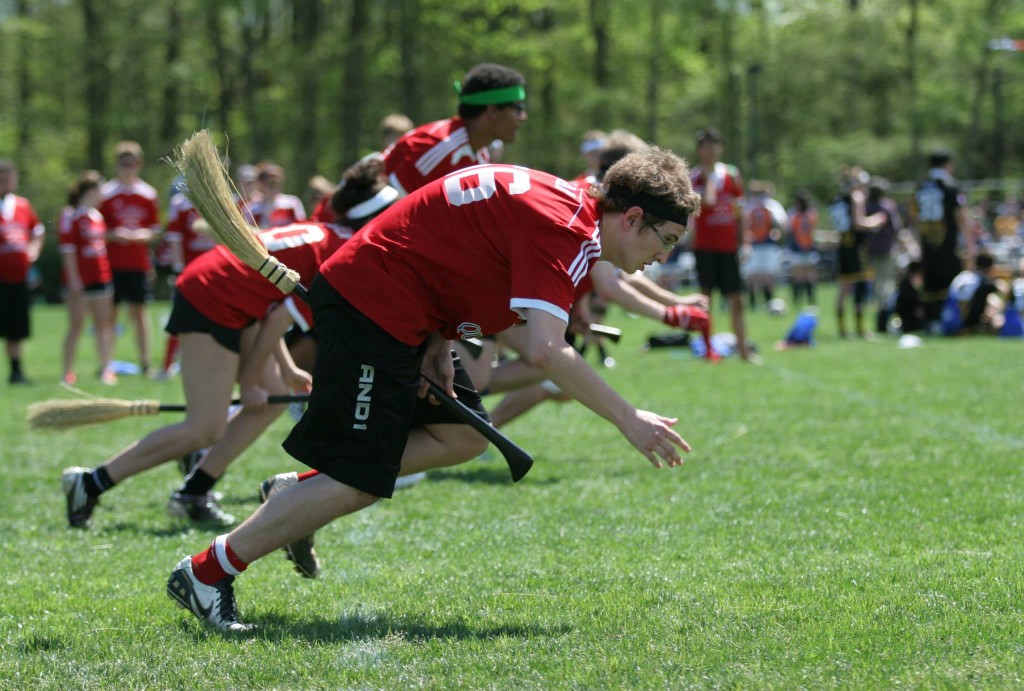
2. Angles: Much like when you pose for a selfie, having the correct angle from which to shoot a photo can turn a good photo into a fantastic photo. The use of angles truly is an underused item in every photographer’s arsenal. Getting low to the ground can make a high-flying dunk look even better and showcase what is happening.
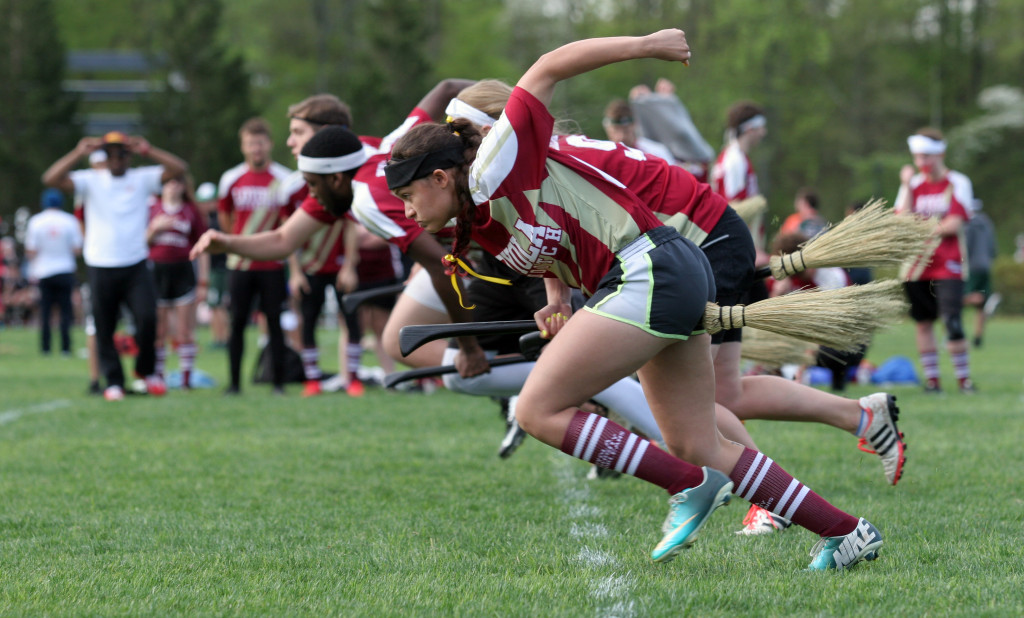
Getting low on brooms up captures the intensity of the start of every game.
If I had been standing at normal height for the above picture, I would be capturing the back of every player and seeing just random limbs as they sprint. By getting low, I am able to capture the faces of the players as well as the intensity as they all sprint to start.

Nicole Harrig did an excellent job capturing the intensity and the emotion of each individual player while still giving the viewer a sense of the team’s collective feelings.
The player huddle is one of the most-captured moments in sports photography; however, a poor angle can make even the most emotional huddle look dull. Being eye level with players in a huddle is nothing special but if you are low to the ground like Harrig was in this picture, you can truly capture the emotion and feeling from all the players. Whether it be nerves or excitement, the only way to get those feelings is by being low in the huddle.
I may have shed a tear, as well.
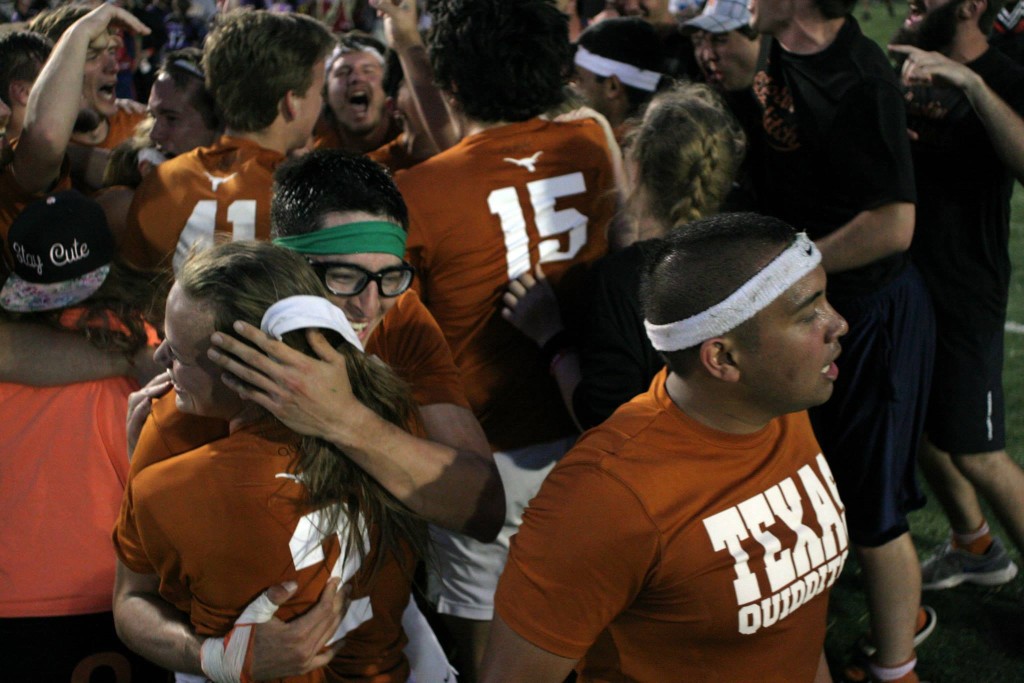
Crowd photos are more difficult. You want to capture the rush of people while still getting the emotion of the audience. For this photo after University of Texas won World Cup 8, I lifted the camera up as high as I could in the middle of the celebration to get a bird’s eye view. It allowed me to capture all the joy and emotion of everybody in the celebration yet still focus in on the emotion of the two Texas players in focus.
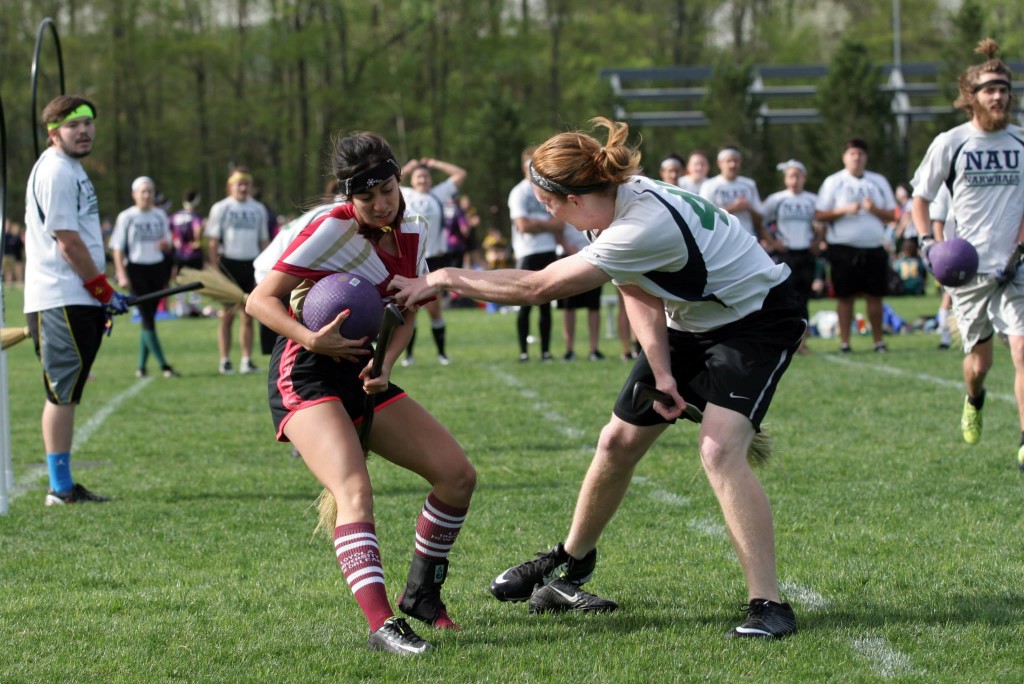
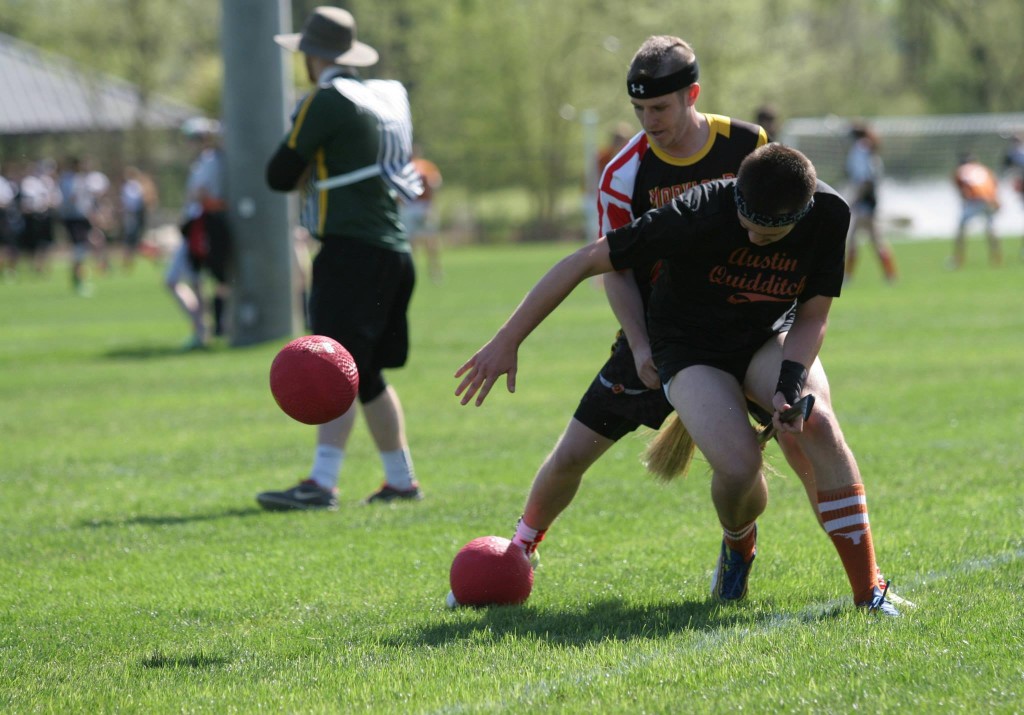
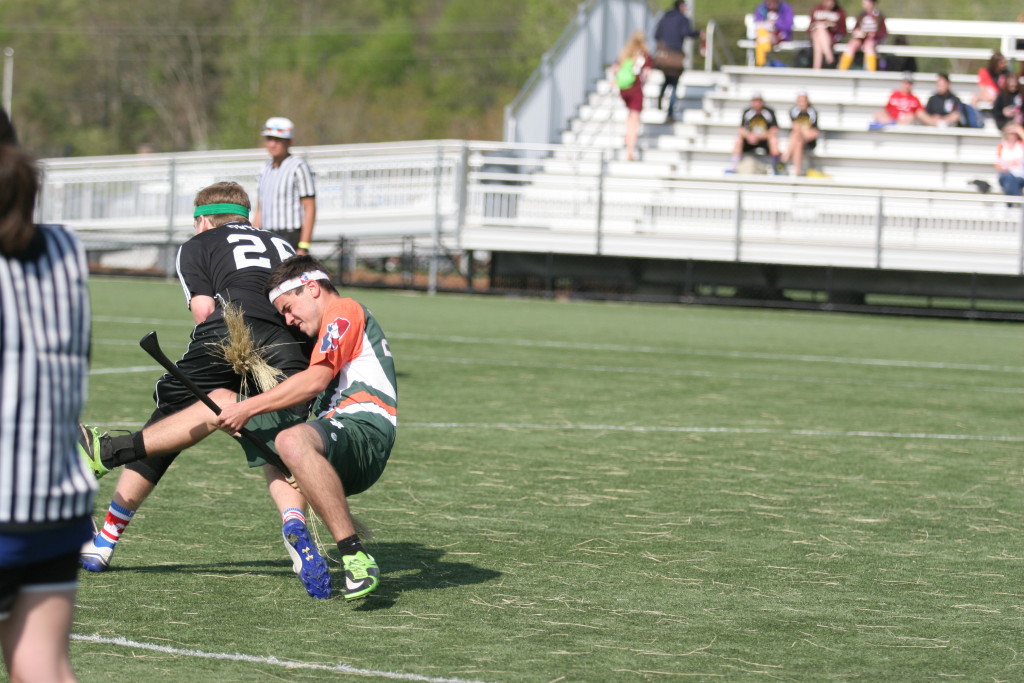
3. Anticipation: A key to getting the best action photos is knowing when they will happen. You have to be a step ahead of the game. Take the following image for example:
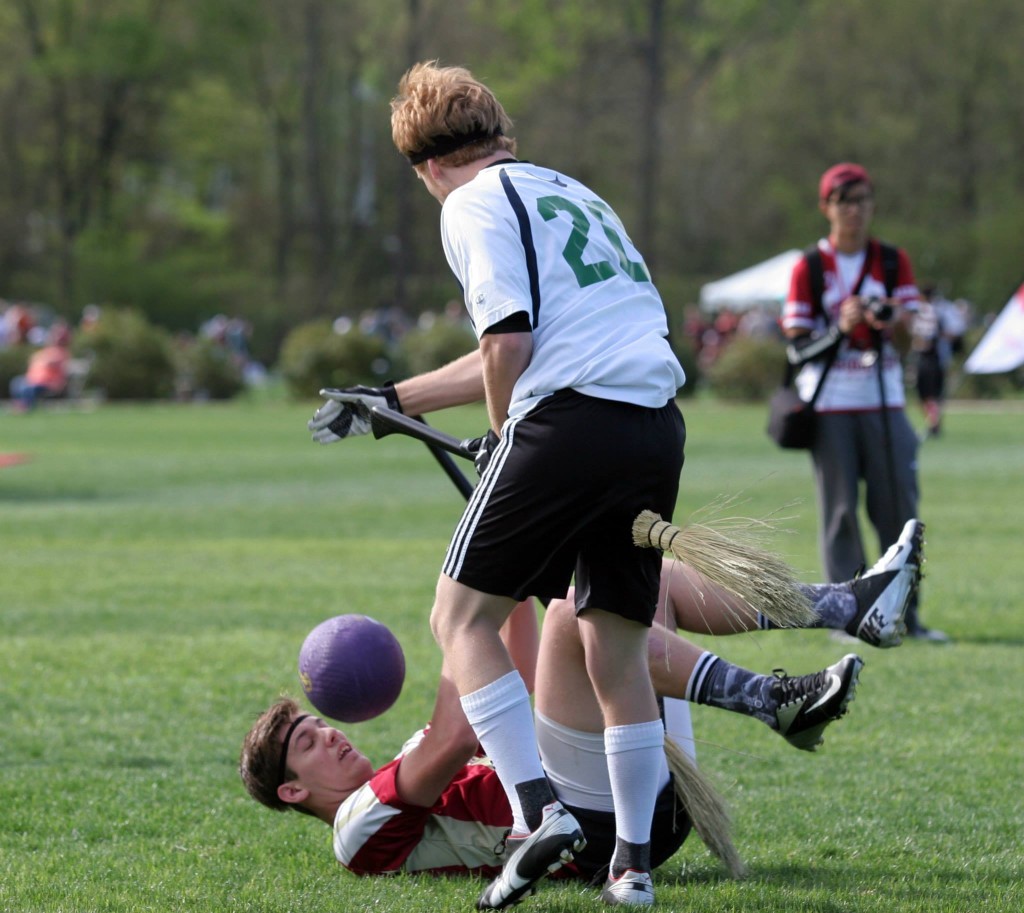
Who doesn’t want to see Tad Walters’ reaction before he gets beat in the face?
If this shot was taken just five seconds later, you would not only risk losing the bludger, but you would also lose the reaction on Tad Walters’ face. The key is to anticipate when the beater is about to throw their bludger and hit the shutter button a split second prior.
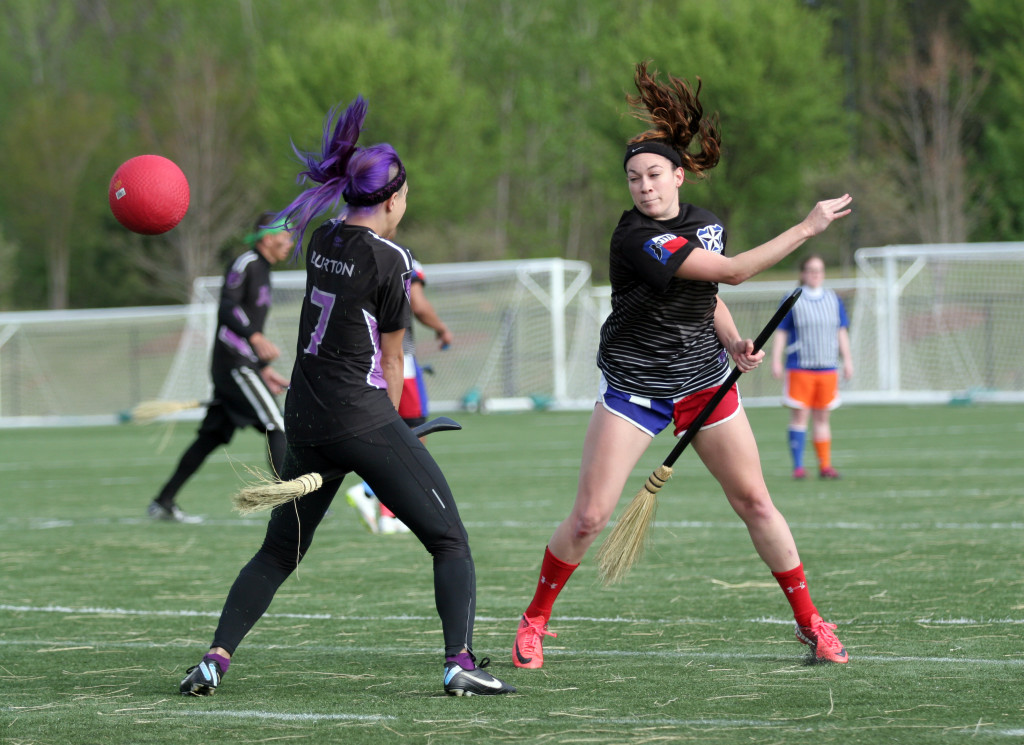
A split second is the biggest difference between a bludger hitting its target and the bludger bouncing away from its target.
This photo is an example of being a split second too late. If I had captured the image just a split second earlier, I could have gotten the ball just leaving the Lone Star beater’s hand. Instead, I got the bludger awkwardly bouncing away from both of them in a much less exciting shot.
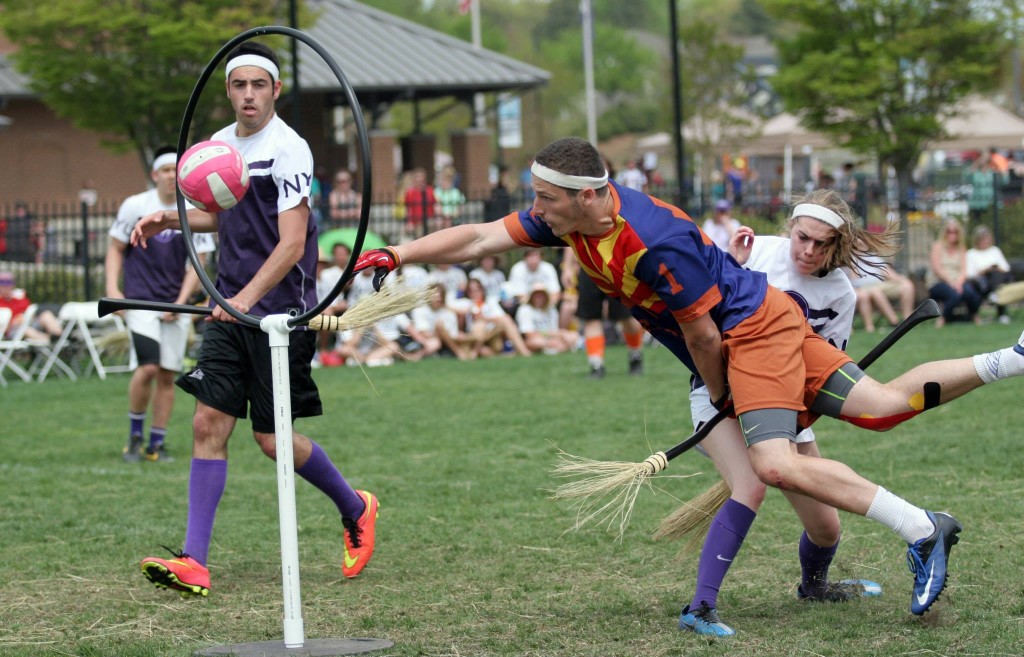
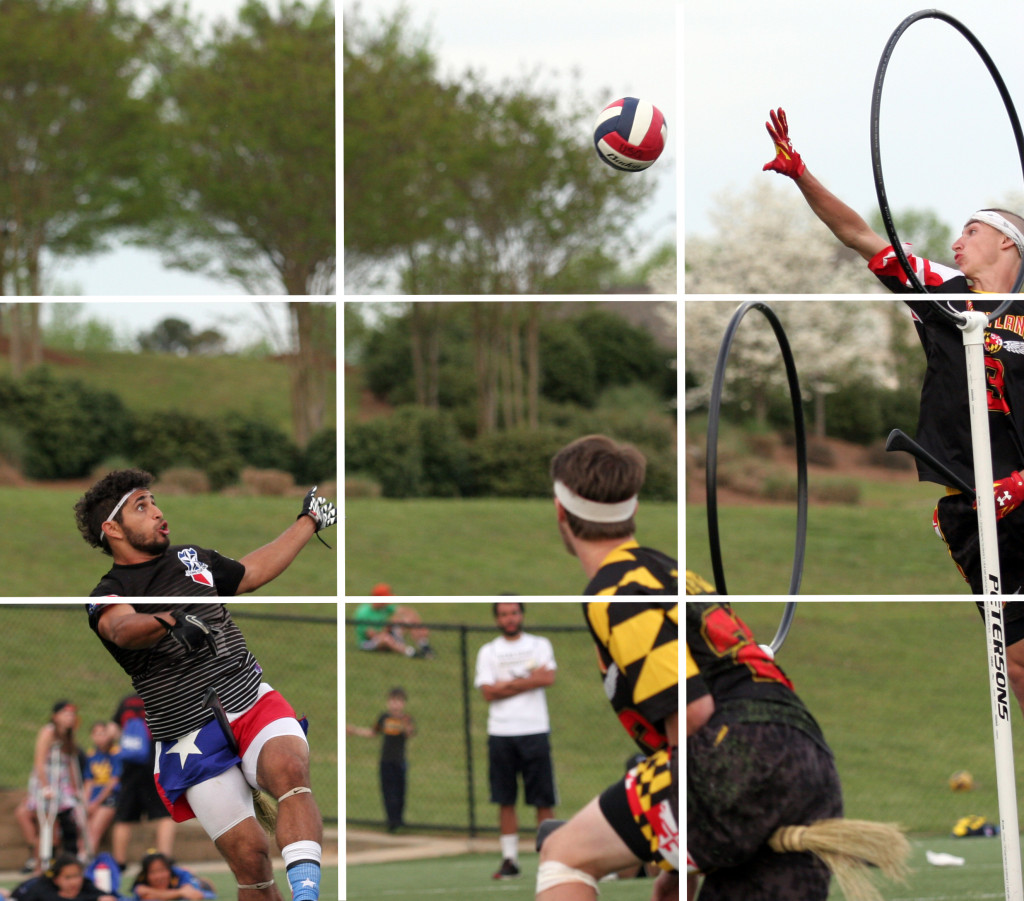
4. Depth of Field: This one is the most advanced technique on this list as you can only accomplish it with the manual focus setting. Depth of field controls the zone of the shot that appears in focus. This setting requires the photographer to alter the camera’s aperture. This underutilized technique can enhance photos tremendously when properly utilized.
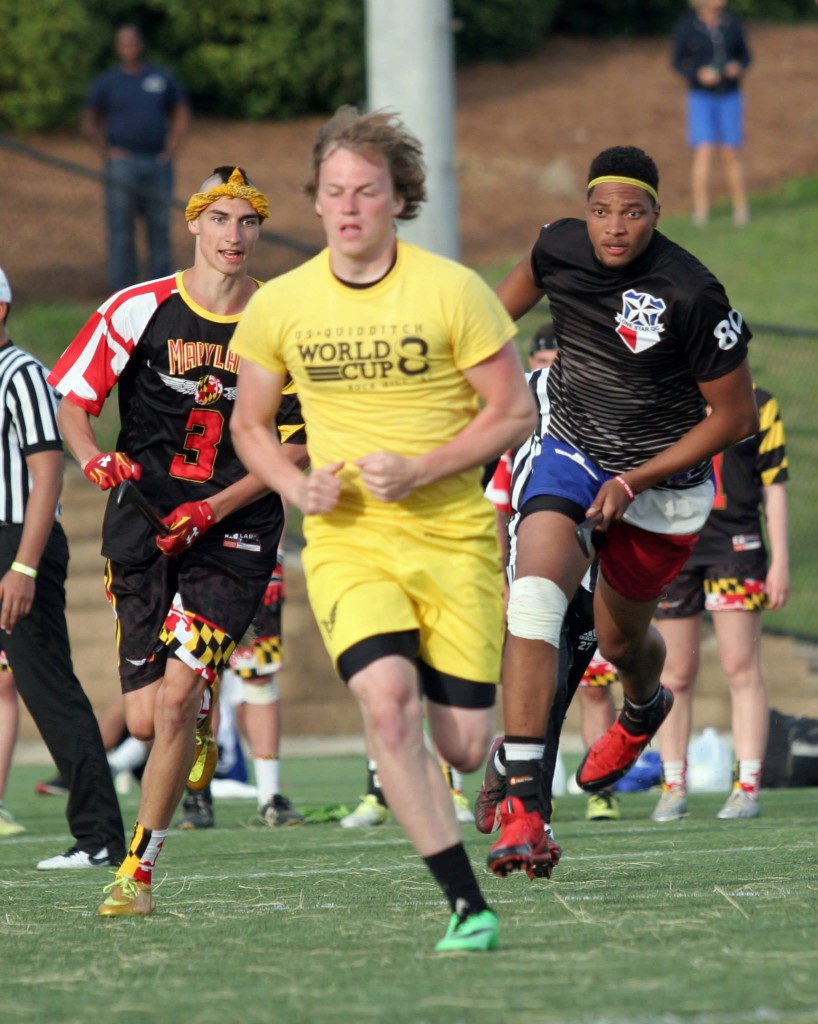
Going for gold.
This is one of my favorite examples of using depth of field. By using a low f-stop (f2.8), the background became a complete blur, while the subject of the photo seems just that much more in focus. I am not trying to get my audience to focus in on the snitch. I am trying to draw them to the emotion of the two seekers behind him that are running at a full sprint. Using depth of field properly allowed me to blur the snitch and focus almost entirely on his pursuants.
5. Know Your Subjects: It seems few quidditch photographers take the time to accumulate background knowledge on their subjects. However, knowing how a team or a specific player moves on the field can help you determine the best positioning while you shoot. For example, if you are taking pictures of University of Minnesota vs Minnesota Nice, you should know these two teams play very defensively with a large emphasis on the beater game. Thus, you should focus on the beaters more frequently than you normally would because that will be the story of the match. And, as an added bonus, that is likely where the most exciting action shots will stem from.
By learning about the teams beforehand, I knew to focus on the beaters. The result was this image.
With both teams known for their beater play, I concentrated most of my images on the beaters of both teams. By doing so, I was able to capture this shot of the beaters going at it.
6. Lighting: Lighting can make or break any photo. Unless you are purposely trying to capture the players as silhouettes, never shoot into the sun. By doing so, it will turn any great image into an image that goes into the trash can. Here’s an example of when I did so and very much regretted it:
Remind me to delete this photo from Facebook after this publishes.
This image may seem fine, but it took a significant amount of editing to make the image even remotely viable. The background looks overexposed and with the shadows covering the faces and bodies of the players, it is difficult to tell what is happening in the image. So how can this be avoided?
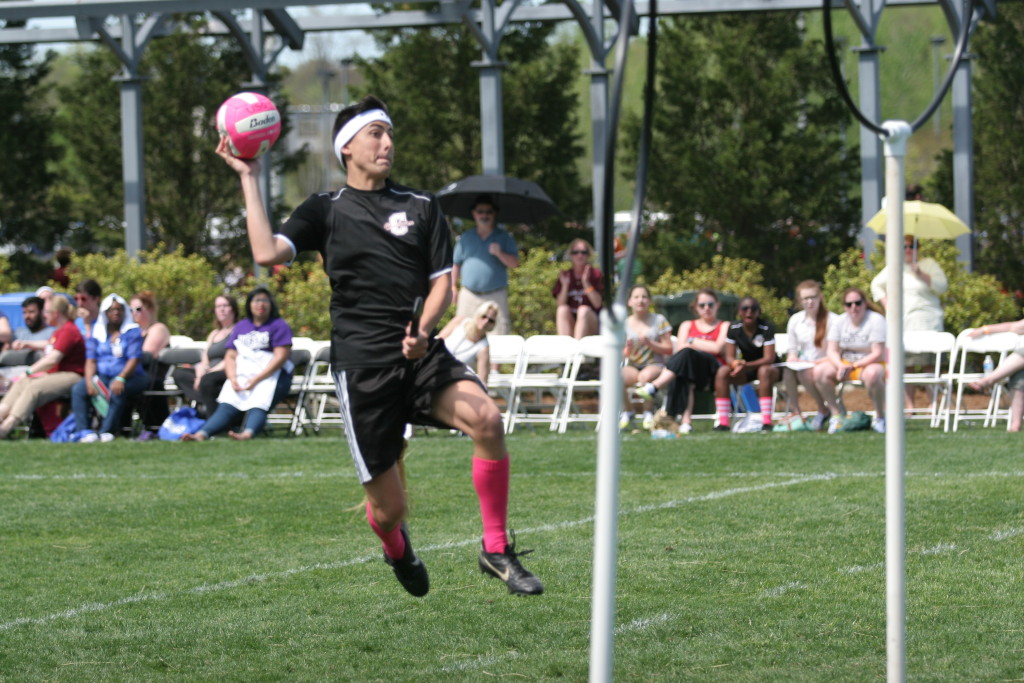
7. Positioning: You have to be positioned properly on the field. You have to take into account what you are trying to take pictures of, where the sun is and where the action is taking place. If one team is dominating a game, it might be smarter to move toward the hoops its players are shooting on to get the best action shots of them scoring.
Moving behind the hoops can help you capture gems like this.
With Arizona Quidditch Club scoring quickly and often, I decided to move to the hoops they were shooting and was able to capture this gem because of it. Each situation requires a different position to get the best shot. During brooms up, the best place to be is typically the starting line, eye to eye with the players. It captures just how explosive they are when the game begins as well as a unique point of view most spectators never get to experience first hand.
Brooms up allows you to get a close up on just how intense the start of games really are.
Also, word of advice, do not stand in one place for the entire game. Nobody wants to see an album consisting of photos taken from the same spot.
8. Rule of Thirds: No photo looks more awkward than a player running off the screen.
Instead of seeing me break a tackle (full disclosure: I didn’t), you see me awkwardly running off the screen with lots of space behind me. Photo by Miki Dorshorst
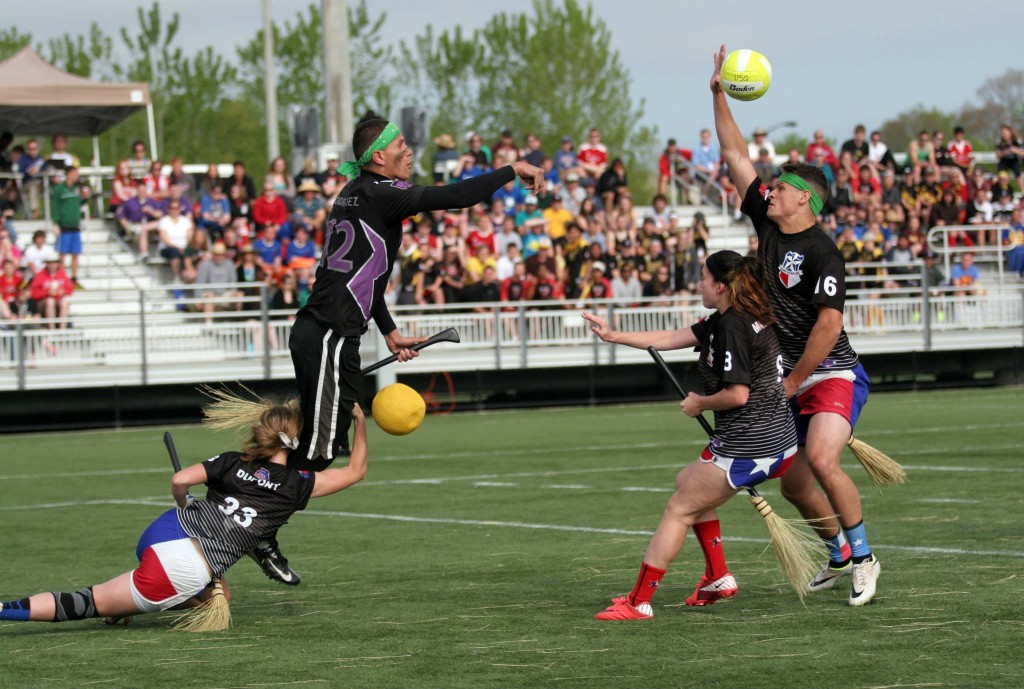
You have to give the players some room to move or else it looks like they are about to run off into the unknown. The best way to follow this is by using the Rule of Thirds. Imagine cutting up the frame with tic-tac-toe board lines. If the player is sprinting down the field, try to keep them on one-third of the frame and leave the other two-thirds for blank space or for a defender to appear. The following image perfectly exhibits the Rule of Thirds:
Instead of making the Lone Star player right in the middle, I used the Rule of Thirds to place him on the left hand side with room for the quaffle to be captured.
The quaffle carrier just shot the ball and he is positioned on one-third of the frame. Because he is so far to the left, it allows the University of Maryland defender to sneak into the frame on the right side at the last second. Not only does this properly follow the Rules of Thirds, but it successfully conveys the entirety of the moment and all parties involved.
9. Editing: Once you are done actually taking the pictures, now comes the time-sucking part. The first step when editing any photo is to adjust the brightness and to enhance the colors by changing the levels and color balance of the image. This can be done easily on Photoshop or Lightroom. Personally, I try to keep the photos as authentic as I can without sacrificing the quality, but each photographer has their own opinion about editing.
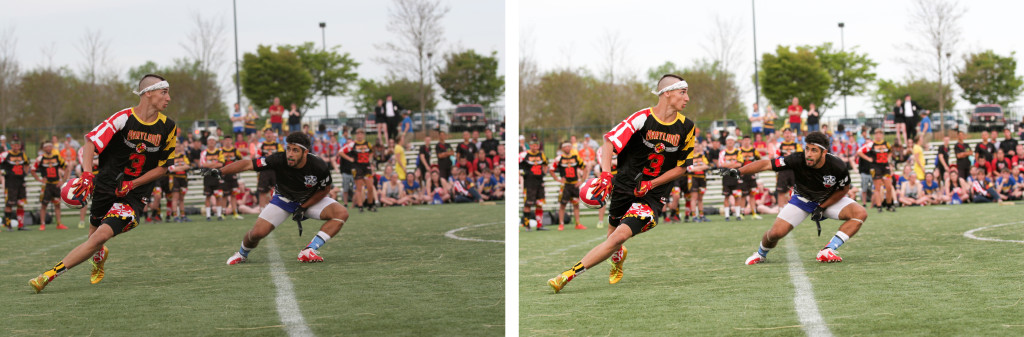
The before and after of a small amount of editing to lighten the image and adjust the contrast in Photoshop.
Next up is cropping the photo. Cropping an image can increase the overall quality or completely ruin the photo and the story you are trying to tell.
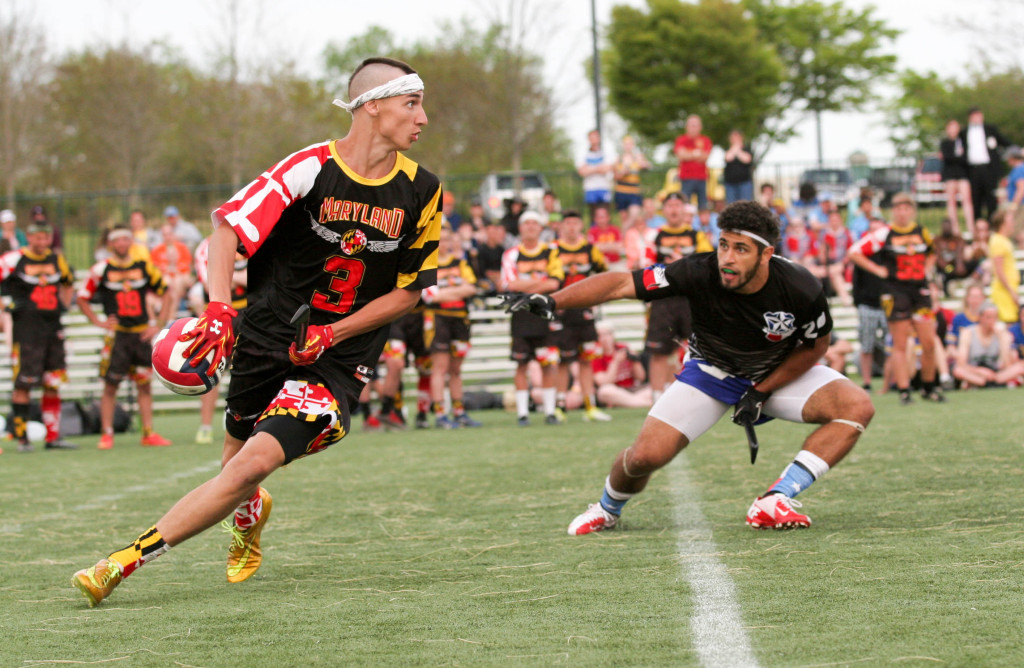
Getting rid of a distracting background is huge while cropping.
Using the Rule of Thirds, I cropped the image to focus on the quaffle carrier and defender. While doing so, I was able to crop out most of the distracting background to allow the viewer’s attention to go straight to the quaffle action. However, not every image that could be cropped, should be cropped.
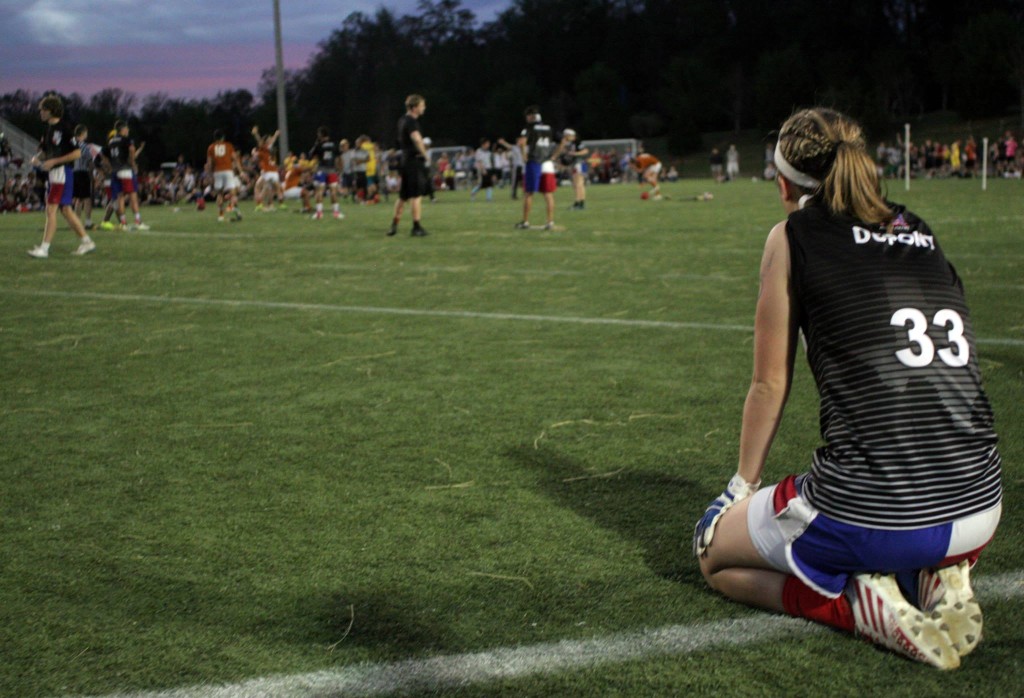
Be sure to always check out what is happening in the background before deciding to crop.
This is one photo where I ultimately decided against using the crop tool. At first, I thought I should crop the photo to showcase Becca Dupont on the sideline.
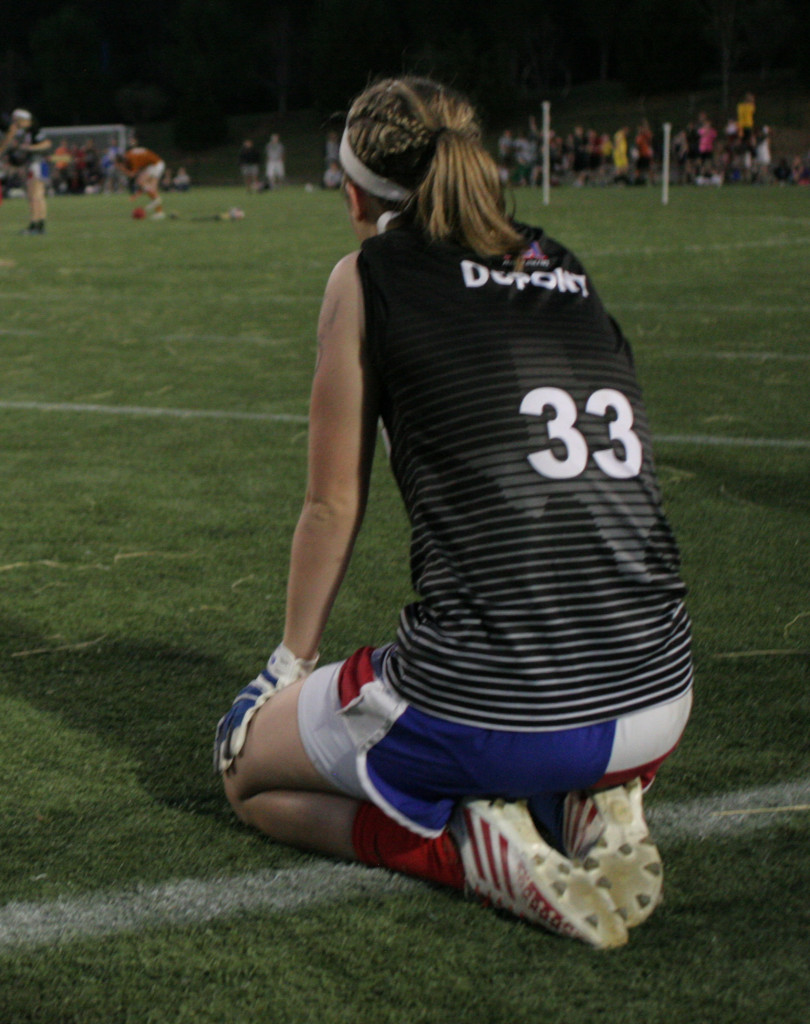
With the image only focused on Dupont, it destroyed the entire story I was trying to create.
But once I noticed Texas’s celebration on the field before her, I realized I would be doing more harm than good to the image. I would have been cropping out the emotion of players on both teams at the end of the championship which showcases the story I was trying to tell.
10. Discard Every Rule You Just Read: Seriously, just throw them all away. The beauty of photography is that you can do whatever you want. There is no certain set of rules to follow. Every rule created is meant to be bent and broken a million times over.
Develop your own unique style and techniques. Shoot your images in a way you feel tells the story. Maybe that requires a few out-of-focus shots or overexposure. It is all about what you, the photographer, want your work to show and what story you want to convey.
Archives by Month:
- April 2025
- May 2023
- April 2023
- April 2022
- January 2021
- October 2020
- September 2020
- July 2020
- May 2020
- April 2020
- March 2020
- February 2020
- January 2020
- December 2019
- November 2019
- October 2019
- August 2019
- April 2019
- March 2019
- February 2019
- January 2019
- November 2018
- October 2018
- September 2018
- August 2018
- July 2018
- June 2018
- April 2018
- March 2018
- February 2018
- January 2018
- November 2017
- October 2017
- July 2017
- June 2017
- May 2017
- April 2017
- March 2017
- February 2017
- January 2017
- December 2016
- November 2016
- October 2016
- September 2016
- August 2016
- July 2016
- June 2016
- May 2016
- April 2016
- March 2016
- February 2016
- January 2016
- December 2015
- November 2015
- October 2015
- September 2015
- August 2015
- July 2015
- June 2015
- May 2015
- April 2015
- March 2015
- February 2015
- January 2015
- December 2014
- November 2014
- October 2014
- September 2014
- August 2014
- July 2014
- May 2014
- April 2014
- March 2014
- February 2014
- January 2014
- November 2013
- October 2013
- September 2013
- August 2013
- July 2013
- June 2013
- May 2013
- April 2013
- March 2013
- February 2013
- January 2013
- December 2012
- November 2012
- October 2012
Archives by Subject:
- Categories
- Awards
- College/Community Split
- Column
- Community Teams
- Countdown to Columbia
- DIY
- Drills
- Elo Rankings
- Fantasy Fantasy Tournaments
- Game & Tournament Reports
- General
- History Of
- International
- IQA World Cup
- Major League Quidditch
- March Madness
- Matches of the Decade
- Monday Water Cooler
- News
- Positional Strategy
- Press Release
- Profiles
- Quidditch Australia
- Rankings Wrap-Up
- Referees
- Rock Hill Roll Call
- Rules and Policy
- Statistic
- Strategy
- Team Management
- Team USA
- The Pitch
- The Quidditch Lens
- Top 10 College
- Top 10 Community
- Top 20
- Uncategorized
- US Quarantine Cup
- US Quidditch Cup